The Art of Layering Props for Depth in Product Photography
Table Of Contents
Balancing Props and Products
A successful product photograph thrives on the harmonious relationship between props and the featured item. Selecting the right props requires a keen eye for balance and scale. Ideally, they should complement and enhance the product rather than overshadow it. Thoughtfully chosen items can create a narrative around the product, drawing the viewer's attention while still allowing the main subject to shine. Consider the size and colour of props, ensuring they support the overall composition.
It is essential to avoid clutter in the frame. When too many elements compete for attention, the product risks becoming lost amidst the chaos. A focused approach involves curating a selection of props that serve a purpose while maintaining a sense of visual clarity. Striking the right balance means using props that resonate with the product's brand identity, thus creating a cohesive image that directs the viewer's gaze appropriately.
Ensuring Focus Remains on the Main Subject
When layering props in a product photograph, it is crucial to establish a clear hierarchy that keeps the main subject at the forefront. To achieve this, select props that complement rather than compete with the product. Using neutral colours or subtle textures in background items can help draw attention back to the brand being showcased. By positioning these props strategically, you can create visual pathways that naturally lead the viewer's eye to the focal point of the composition.
Maintaining focus on the primary item can also be enhanced by manipulating scale and perspective in your arrangement. Larger props placed further back can add depth while still allowing the main subject to shine. Similarly, implementing varying levels of texture can anchor the picture while allowing the product to remain the central attraction. Thoughtful placement of each element ultimately contributes to a cohesive image that celebrates the product without overwhelming it.
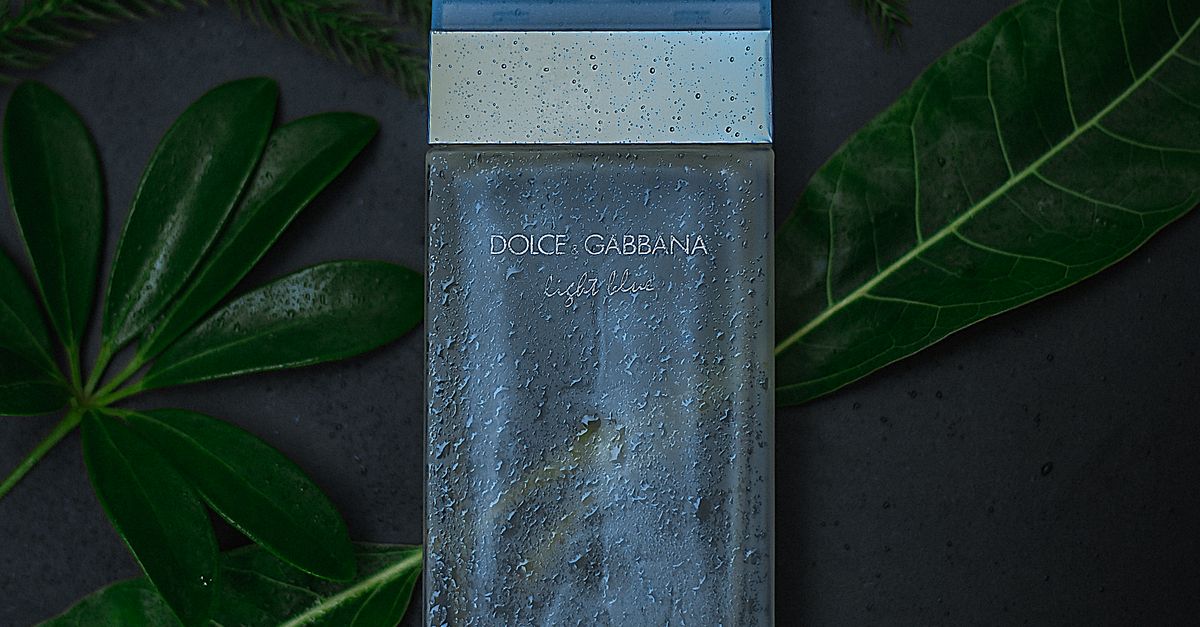
Incorporating Natural Elements
Integrating natural elements into product photography can create a harmonious connection between the item and its environment. Textures like wood, stone, and foliage add authenticity and warmth to images. Incorporating items such as leaves, branches, or flowers enhances the visual appeal while reflecting a commitment to sustainability. These organic materials can complement the product’s attributes, making it feel more relatable and desirable to potential buyers.
When using natural props, it's crucial to consider their scale and colour in relation to the main product. Mismatched sizes or overly vibrant hues can divert attention instead of enhancing it. Subtle monochromatic tones tend to work well, allowing the product to shine without distraction. Additionally, arranging these elements thoughtfully fosters a sense of storytelling, inviting viewers to engage more deeply with the scene.
Using Organic Materials for a Unique Touch
Incorporating organic materials into product photography adds a layer of authenticity that resonates with viewers. Natural elements such as wood, stone, or dried foliage can enhance the overall aesthetic, bridging the gap between the product and its environment. This approach not only imbues images with a sense of warmth but also communicates a connection to nature which many consumers appreciate. The textural variety provided by these materials further enriches the composition, drawing attention and providing a tactile feel that resonates visually.
Utilising items like fresh flowers, herbs, or even textured fabrics can significantly elevate the visual narrative. The colours and shapes of organic elements create a harmonious backdrop that complements various products without overwhelming them. Choosing materials that reflect the product's essence fosters a balanced composition. This strategy invites viewers to engage with the image more deeply, creating a memorable experience that might translate into a desire to purchase and use the featured product.
Lighting Considerations with Layered Props
The interplay of light and shadow can dramatically influence the impact of layered props in product photography. Soft, diffused lighting tends to minimise harsh shadows, creating a more cohesive look across all elements in the frame. This approach allows the textures and details of each layer to stand out. On the other hand, using directional or harder light sources can enhance the dimensionality of the scene. Shadows can create a sense of depth, drawing attention to the intricate layers that surround the main product.
When considering how to position your light sources, it's essential to keep in mind how they will interact with each prop. Experimenting with different angles can uncover unique visual narratives. For instance, backlighting can accentuate transparent or semi-transparent props, adding allure to the composition. Similarly, lighting from the side can reveal the textures of organic materials, providing a tactile quality that enhances viewer engagement. Ultimately, mastering the nuances of light can elevate your layered compositions, making them both inviting and dynamic.
Techniques to Enhance Depth with Light
Strategic lighting can significantly add depth to a scene by creating shadows that enhance the dimensionality of the products and props. Using side lighting or even backlighting can help accentuate textures and forms. This technique highlights the character of each element within the composition. Shadows cast by props can lead to a more three-dimensional feel, inviting viewers to engage visually with all layers present.
Incorporating techniques such as rim lighting can also help to outline the edges of products and props, separating them from the background. This method creates visual interest and draws focus while maintaining a cohesive look. Experimenting with light intensity and direction allows for a range of effects, enabling photographers to find the perfect balance that complements the overall aesthetic.
FAQS
What are some tips for balancing props and products in photography?
To balance props and products, ensure that the props complement rather than overshadow your main subject. Use a mix of sizes, shapes, and textures to create visual interest, but keep the focus on the product by choosing props that are subtle and harmonious.
How can I ensure my main subject remains the focus of the photo?
To keep your main subject in focus, use a shallow depth of field to blur the background props slightly. Additionally, position your product prominently in the frame and consider using leading lines or contrasting colours to draw attention to it.
What are some ideas for incorporating natural elements into my product photography?
You can incorporate natural elements by using items like leaves, flowers, stones, or wood. These organic materials can add texture and warmth, creating a more inviting scene that enhances the overall aesthetic of your product.
How do organic materials enhance the visual appeal of a photograph?
Organic materials add a unique touch and depth to your photographs. Their varied textures and natural forms create a sense of authenticity and can evoke emotions, making the product feel more relatable and desirable to viewers.
What lighting techniques can I use to enhance depth with layered props?
To enhance depth, consider using side lighting or backlighting to create shadows and highlights. Soft diffused lighting can also help separate layers, adding dimension. Experimenting with different angles and intensities of light will help you find the best setup for your shot.
Related Links
Techniques for Incorporating Colour Theory in Product StylingThe Role of Textures in Styling Products for a Stunning Visual Impact
Innovative Ways to Use Natural Elements in Styled Shoots
Seasonal Styling Ideas for Product Shoots Throughout the Year
DIY Prop Ideas to Elevate Your Product Photography
Tips for Arranging Props to Enhance Product Focus
Balancing Minimalism and Detail in Product Styling